Hey!
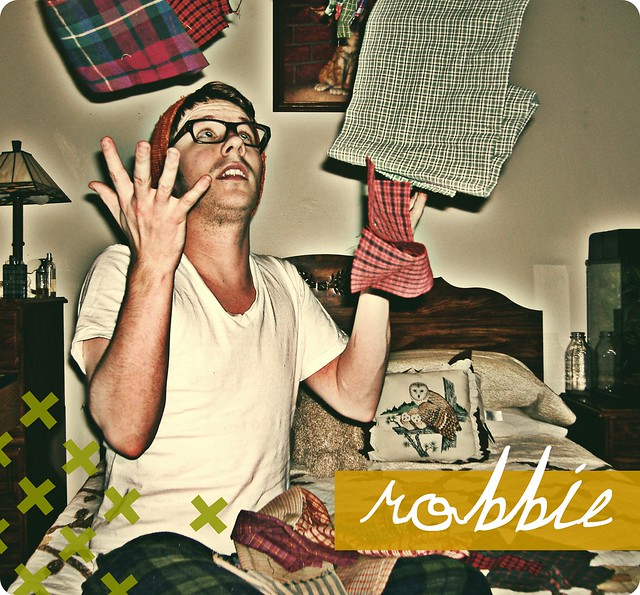
I’m Robbie of
Knitxcore. I’ve been a crafter/blogger for the better part of decade. I’m dedicated to bring my readers unique craft ideas mixed with vintage materials and inspirations. I really love all things quirky and kitsch and it’s almost always reflected in my work.
I am so honored to be a guest blogger on Sparrows and Arrows. So much so, that I’ve written a super special tutorial for all of you readers!
Enjoy!
<3
Robbie
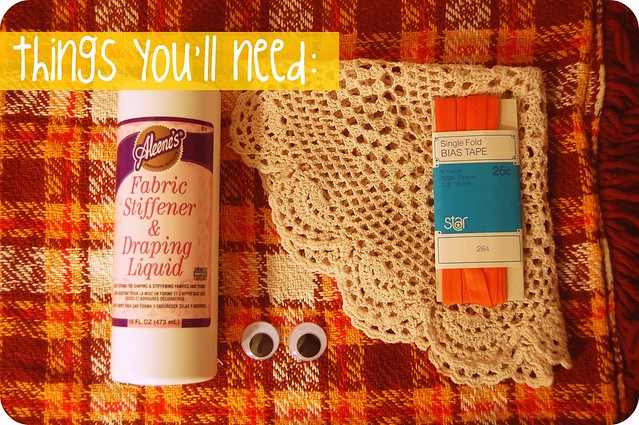
Things You'll Need:
-Fabric Stiffener
-Vintage Doilies
-Large Googly Eyes
-Bias tape or Ribbon
-Felt
-Glue
-A Large Shallow dish
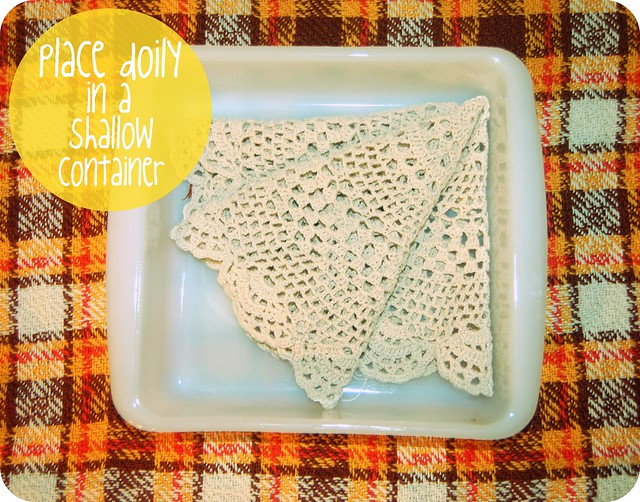
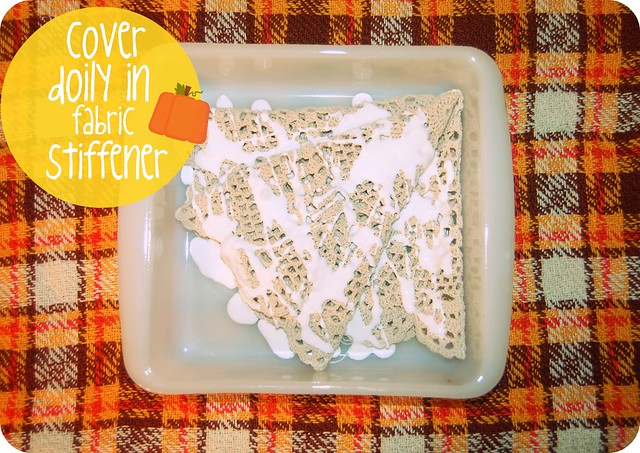
Step 1: Place a doily in your dish. I used vintage Pyrex. Don't do that.
Step 2: Pour the fabric stiffener onto the doily. Be sure to get every side and in between folds.
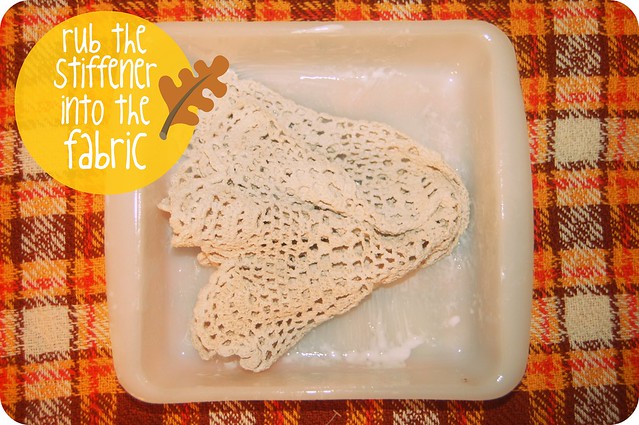
Step 3: Rub the stiffener into the fabric. This is really really messy (but also the most fun part!). Have a bowl of water and a towel to wipe off hands. I didn't. There is goop on every door knob in my house. Oops!
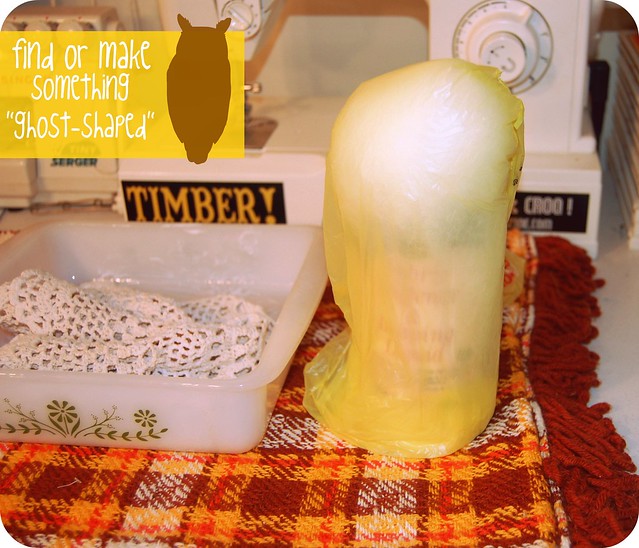
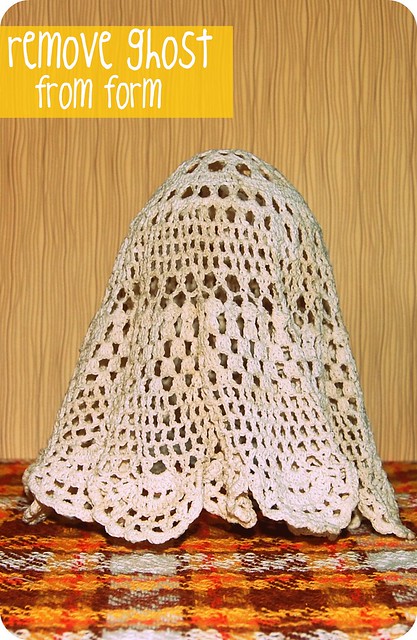
Step 4: Find something "ghost-shaped" and appropriate to the size of doily you are using. I put polyfill on top of the fabric stiffener bottle until it looked right. You could just as easily blow up a balloon and put it in a dixie cup. Be sure to cover your form in a plastic bag so it doesn't get sticky.
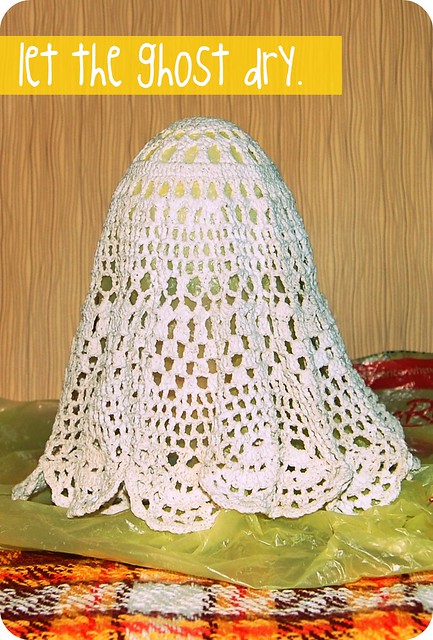
Step 5: Place the gooey doily on top of the form. Arrange it so it looks "ghosty". Let it dry. This part could take a day (or at least over night).
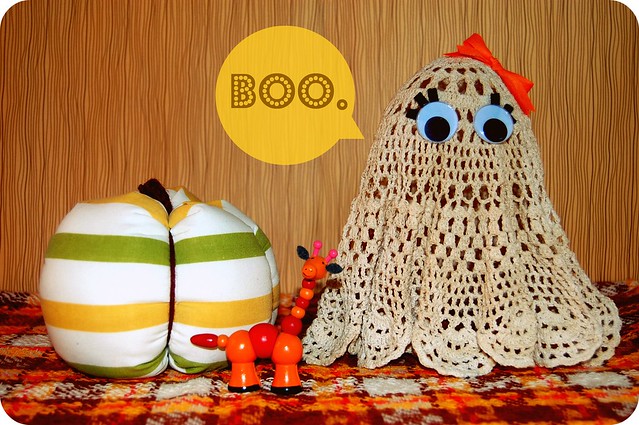
Step 6: After the ghost dries, peel away the plastic bag. You should have a stiff ghost that stands up on it's own.
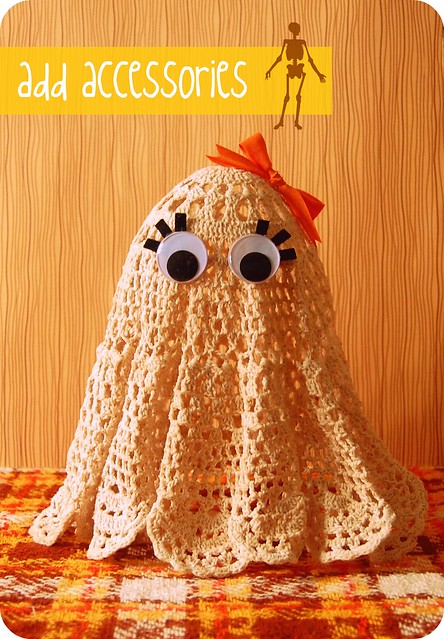
Step 7: Glue on eyes and felt accessories! You're finished!
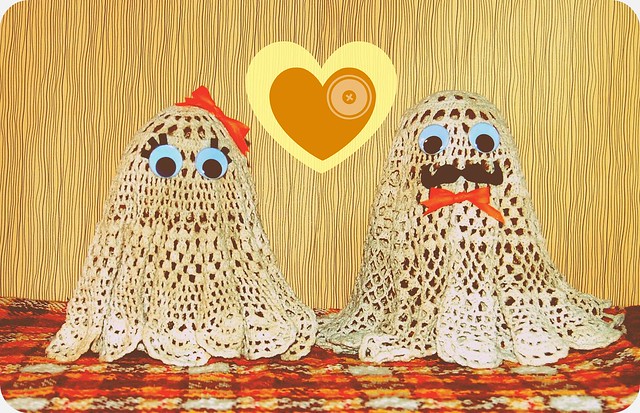
Make your lil' lady a gentlemen caller. Ghosts get lonely, too!
____________________________________________________________
Thanks so much Robbie! I literally squealed when he sent me the pic of the lady ghost as a sneak peek! I love them -and his blog knitxcore, it has such great photos, I wish I had the patience to edit and set up photos like him!