Showing posts with label guest post. Show all posts

10/26/11

Guest Post > Harry Potter Costumes

Hello lovelies, Mandy from Dash it All here!

I tried really hard to not make this post about Harry Potter.
But I failed.
Let's face it, HP is king of Halloween.
What's that? You don't think so?
What about all the floating candles, gigantic pumpkins
and three-headed dogs they have lying around that castle?
Not to mention the ghosts, black cats and tons of candy those kids eat!
So clearly I'm right. No apologies necessary.
My favorite Halloween costumes over the years
have been of a Hogwartian theme.

It all started one year with a desire to be Hermoine.
A gothic Hermoine.


That's my friend Franklin rockin the part of HP himself.
Adding the gothic aspect turned the costume from
downright nerdy (which I'm actually perfectly ok with)
to punktasticliciousness.

Girls need:
Prep Skirt
White Button Up
Black Sweater
Tie (in the house color of your choice)
Black Tights
Converse/Vans
Lot's of Black Eye Make Up
Red Lips
And a Wand (I think I used a chopstick lol)

Boys need:
Black Pants
White Button Up
Black Sweater 
Tie (in the house color of your choice)
Converse/Vans
Lot's of Black Eye Make Up
Perhaps a Scar
And of course a Wand


I did that for a few years
and let me tell you
I felt like the belle of the ball.
No joke.

Then one year I decided to mix things up as Tonks!
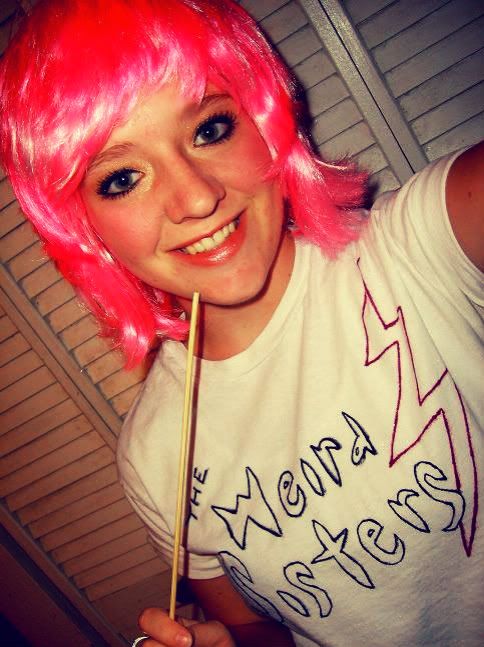
 

She's pretty easy to put together too!

Pink Wig
Make a Weird Sisters Tee from a White Tee and Markers
Ripped Jeans
Converse
I added Sparkly type Eye Make Up
And a Wand and Voila!

I've seriously never had more fun dressing up
than when I'm decked out DA style.
I recommend everyone try it and experience
the magic for yourself!

____________________________________________

Thanks Mandy! This is perfect timing, with our Harry Potter party 5 days away!

10/24/11

Guest Post > Frankenstein DIY

Hi, I'm Andrea from Paper Sparrow!  I am so excited to be guest posting for Jessi and Cassie's blog since we share a similar love of Sparrows and Zoolander (honestly it is hard to not throw a quote in right here) ; )  This year for Halloween I have been re-watching all the kitschy retro horror films and knew I wanted to make some Frankenstein silhouette pieces.  I decided on decorating a pair of shoes as well as adding a couple brooches to my collection.  

Frankenstein shoes 1
Frankenstein supplies
Frankenstein instructions
Frankenstein badge
Collar:  Molly-Made  Arm Warmers: Sock Dreams  Brooch and Shoes: DIY'd  Brooch Setting: Cab Figments
Frankenstein brooches
 
The his and hers silhouette brooches use the same images on bat-themed cameos!  They pair perfectly with my new Oliva Frankenstein pouch and vinyl wallet from etsy.
Olivia frankenstein
I just love the style of these films and am so glad to have rewatched them this year : )
Are these classics on your favorites list this time of year?  Do you secretly want the Bride's grey stripe in your hair as much as I do?  Anyway, thanks so much for having me on Sparrows and Arrows!! You ladies are the best : )

------------------------------------------------

Thanks Andrea! Go check out more fun Halloween Inspiration on Paper Sparrow !

10/21/11

Guest Post > Halloween Cross Stitch & Giveaway!

Good Day, all you Sparrows & Arrows Peeps! I am Annika from All The Live Long Day and I am delighted to be guest posting here for you today! I wrote tried to write a embroidery tutorial and there is a giveaway involved, too, so read on to find out what the prize is and how to get your mitts on it!


Photobucket

When Jessi asked me to write something Halloweeny, I had just started a little project for a friend. This friend and I used to spent each Halloween together, watching scary movies. Now we live in separate cities and can't do that anymore, so I thought I would send her a little gift for old times sake.

One of my favourite things to do is cross stitching, and I found a cute Halloween design at Gazette94 that I decided to make. (Just FYI: Gazette94 is full of great cross stitch designs for all levels of capability. Sadly, the blog is no longer being updated, but the back catalogue of free downloadable charts is immense.)

It took me just a few nights huddled up on the sofa in front of the TV to stitch the scene. I made it into a wall or door hanging by using a piece of vintage fabric for the back, attaching a ribbon loop, sewing it all together, and stuffing it with cut up old tights and a few pieces of cinnamon and star anise for a nice, autumnal smell.

Photobucket

Even if you have never cross stitched before, it is probably the easiest of all embroidery techniques. All you need is a bit of an an eye for detail and some patience. The stitching itself is really simple.

A few things before you begin: a thread of regular stranded cotton is made up out of 6 single strands. I divided my stranded cotton in two, which gave me a thread of three strands to work with. You can choose to stitch with only two strands or with all six, it's up to you and will give you slightly different end results. I cut my thread to the length of about 30 cm, which makes it manageable and avoids tangles. 

A typical piece of cross stitch fabric is weaved very loosely, so that you can easily see where you have to make your stitches. I work one cross stitch in a square of nine of these 'holes'. 

The best way to start a cross stitch design is to determine the approximate middle point of the chart and of your fabric and start stitching from there. That way you make sure that you will have enough fabric on each side to properly complete the design.

When working with different colours, always start with the darkest shades first, and make sure you wash your hands before you pick up your embroidery. Otherwise the stitches might start to look a bit tatty after a while.

HOW TO DO THE ACTUAL STITCHES

Photobucket

1. In order to make the first stitch, you could just make a knot in the end that will prevent it from pulling through the fabric, but I prefer to secure my first stitch by trapping it under the thread at the back. Push your needle into the space between the weave at the front of the fabric, pull it through almost all the way, holding it with one finger. When you push the needle through again from back to front, make sure the end of the thread is caught under that stitch.

2. To make a row of stitches, first complete the ones that point from left to right.

3. To complete the row, then stitch back from right to left. Neighbouring stitches will always share two 'holes'.

4. When you have used up your length of thread or need to start a new colour, secure the end of the thread at the back of your work by running it under a few stitches and back.

5. I find running it back and forth once under about 4 or 5 stitches does the trick.

6. Cut your thread very close to the fabric, in order to avoid bulk. This is especially important if you are planning on framing your work. In that case you would want it to lie as flat as possible. 

After you finish your last stitch, do a little dance, admire your handiwork and then frame it, sew it into a door hanging like I did, make a mini-cushion, send it to somebody as a card or do whatever else you fancy.

And if you have trouble understanding what the heck I was trying to get across, go here for a better tutorial on cross stitching. (I am horrible at explaining things!)

If all of this looks like fun and you need a new project or would like to try your hand at cross stitching for the first time, come on over to All the Live Long Day now, where you can enter a giveaway to win one cross stitching set that contains everything you need to make this Halloween design. 

Looking forward to seeing you!

Photobucket
© All The Live Long Day (unless otherwise stated)
 
-------------------------------------------------------------

Thanks Annika! I used to cross stitch when I was younger, my aunt taught me and I have been thinking about starting again - thanks for the inspiration to get back at it!! Next time you are in Canada Annika,- come to our coast instead!

10/19/11

Guest Post > Creepy House Tour

Hey Sparrows and Arrows readers! Aminah here, one of the owners of The Thrifty Gypsies.

First, I'll admit that when Jessi asked me to do a guest blog post I was a bit nervous. I don't blog and thought it'd be super hard to come up with something worth doing a blog post about. It's October and October is obviously Halloween month, so great, what about Halloween could I write about? Then it dawned on me that our house is spooky and looks like it's been decorated a little bit for Halloween all year round. From creepy early 1900's photos of people we don't know, the boxes of deer antlers to there being at least one skull in every room (not counting our skull tattoos, of course) So I thought I'd share a few creepy bits of our house with you... I promise you that none of these photos have been staged, our house is really this creepy, all the time. 


Thank you for having me Jessi and Cassie!!!!!!!!

________________________________________________________ 
Thanks Aminah!  I can attest to the creepiness of their house - we are neighbors :)  Make sure you check out thrifty Gypsies on Etsy and facebook!

10/17/11

Guest Post > Doily Ghosts

Braided rug scraps

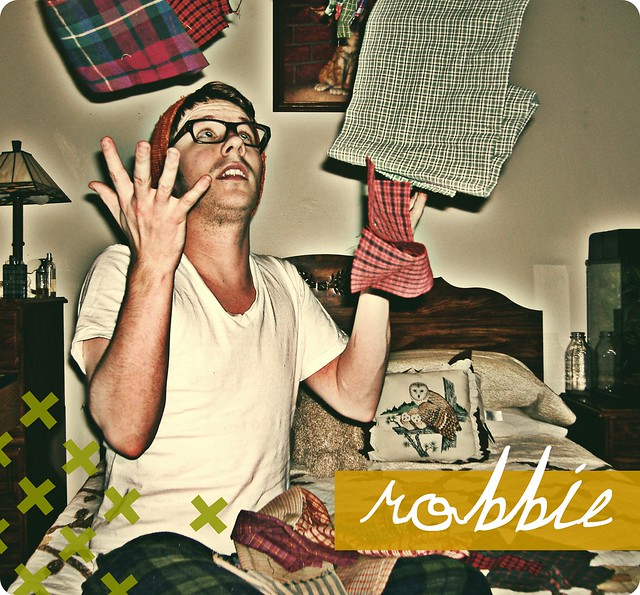
Hey!
I’m Robbie of Knitxcore. I’ve been a crafter/blogger for the better part of decade. I’m dedicated to bring my readers unique craft ideas mixed with vintage materials and inspirations. I really love all things quirky and kitsch and it’s almost always reflected in my work.

I am so honored to be a guest blogger on Sparrows and Arrows. So much so, that I’ve written a super special tutorial for all of you readers!
Enjoy!

<3
Robbie

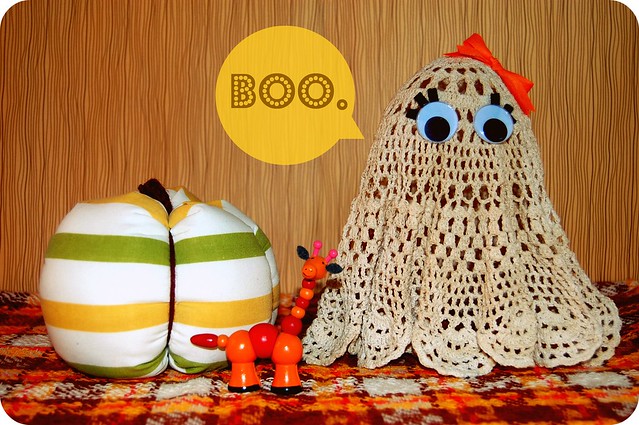
finished doily ghost.


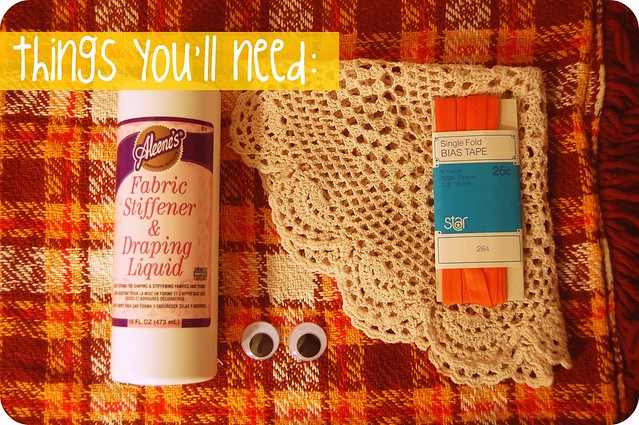
doily ghost tutorial: materials.

Things You'll Need:
-Fabric Stiffener
-Vintage Doilies
-Large Googly Eyes
-Bias tape or Ribbon
-Felt
-Glue
-A Large Shallow dish
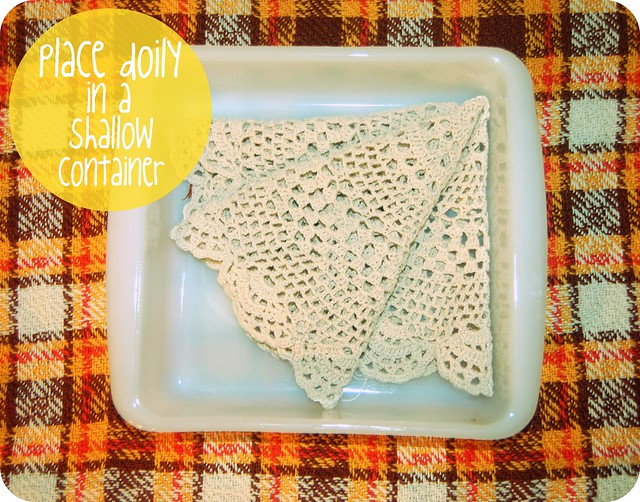
doily ghost tutorial: step 1.

Step 1: Place a doily in your dish. I used vintage Pyrex. Don't do that.
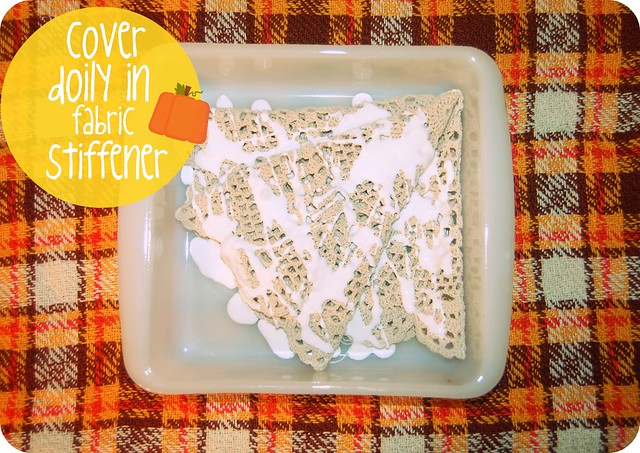
doily ghost tutorial: step 2.

Step 2: Pour the fabric stiffener onto the doily. Be sure to get every side and in between folds.
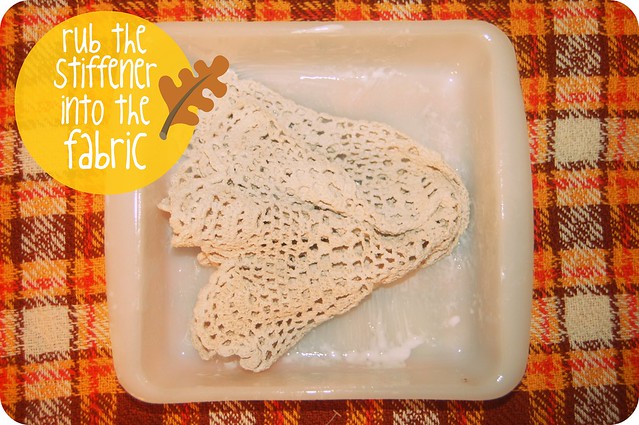
doily ghost tutorial: step 3.

Step 3: Rub the stiffener into the fabric. This is really really messy (but also the most fun part!). Have a bowl of water and a towel to wipe off hands. I didn't. There is goop on every door knob in my house. Oops!
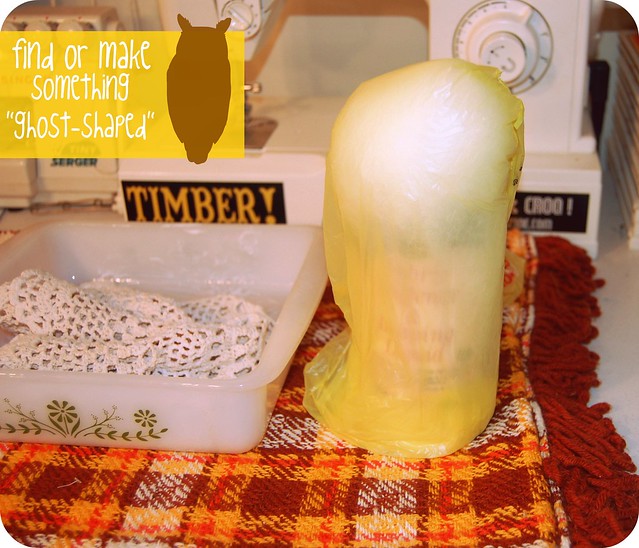
doily ghost tutorial: step 4.

Step 4: Find something "ghost-shaped" and appropriate to the size of doily you are using. I put polyfill on top of the fabric stiffener bottle until it looked right. You could just as easily blow up a balloon and put it in a dixie cup. Be sure to cover your form in a plastic bag so it doesn't get sticky.
doily ghost tutorial: step 5.

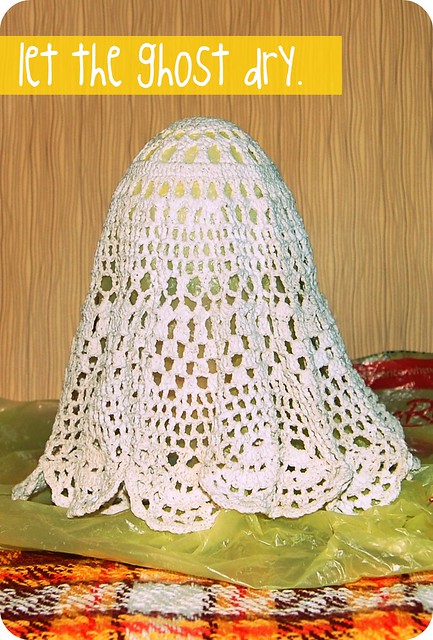
Step 5: Place the gooey doily on top of the form. Arrange it so it looks "ghosty". Let it dry. This part could take a day (or at least over night).
doily ghost tutorial: step 6.

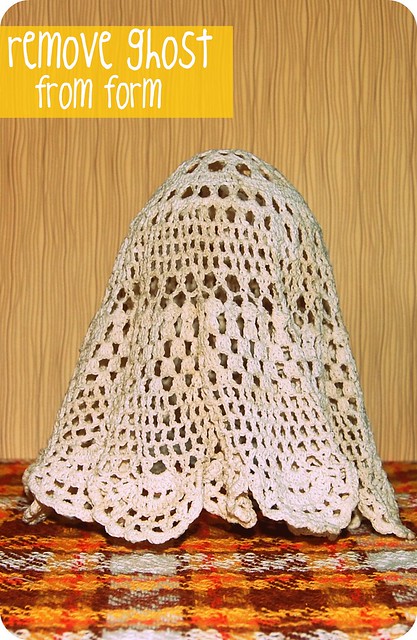
Step 6: After the ghost dries, peel away the plastic bag. You should have a stiff ghost that stands up on it's own.

doily ghost tutorial: finished!

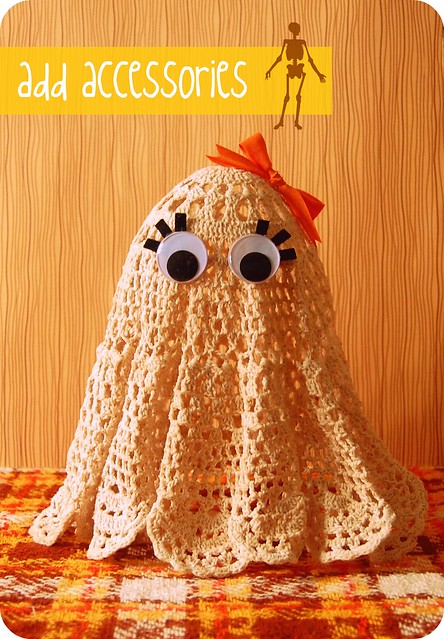
Step 7: Glue on eyes and felt accessories! You're finished!

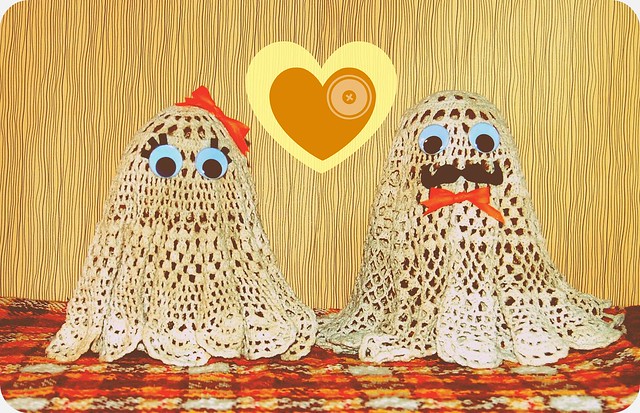
ghosties in love!

Make your lil' lady a gentlemen caller. Ghosts get lonely, too!


____________________________________________________________

Thanks so much Robbie! I literally squealed when he sent me the pic of the lady ghost as a sneak peek! I love them -and his blog knitxcore, it has such great photos, I wish I had the patience to edit and set up photos like him!

10/14/11

Guest Post > Pumpkin Recipe

Hello followers of Sparrows and Arrows. I’m so excited to be your guest post blogger today! Over on live.eat.smile. it’s the season for cooler weather, fun fall outfits (boots and scarves!) and finally being able to turn your oven on (those of you who don’t have air conditioning will understand!).

I had a ton of fun doing just that a few weekends ago. I cut the chill in the air with a warm sweater and cranking my oven for the entire afternoon!

So my question to you all is: what do you do with all that leftover pumpkin seeds and pumpkin meat leftover from decorating your houses? I asked that question last year after gutting and carving three pumpkins. I came up with these two tasty recipes with the help of the internet!

I LOVE granola! I love it for breakfast or for snack. Nothing beats some plain yogurt, fresh or frozen berries and some crunchy granola. Here’s a fun nut free version, but you can always add (or subtract) whatever your taste buds desire.


Everyone knows about pumpkin pie, but have you ever ventured from the usual? What about pumpkin cupcakes or muffins? Pumpkin pudding, soup or perhaps pumpkin cheesecake? I tried the cake with AMAZING results. My favourite part? Using ground up pumpkin seeds in the crust! I used a coffee grinder to get the toasted seeds to the same consistency as the graham cracker crumbs.


I hope you all have fun experimenting in your kitchen this season!


Emilie

______________________________________

Thanks Emilie! She brought this into work (we share an office) and it was delicious!
 

10/12/11

Guest Post > Halloween Finds


Hey everyone - it's Krystal (from Village) here. I'm so happy to be guest posting on one of my long time blog reads! I figured I'd do the kind of post I do best, finding things I like and sharing them. When it comes to Halloween I'm definitely not one to go all out - so these are some things that I'd purchase that I could use year round I think (ok, maybe except the 'eat drink and be scary'...or I could I guess? )
Hope you enjoy!

1. Fractured Skull Necklace (Upper Metal Class. $40. etsy)
2. Eat, Drink and Be Scary print (ExLibris Journals. $7. etsy)
3. Stanley Skull Flask (kaboodle. $25.)
4. Gold Skull Candle (Olive & Cocoa. $115)
5. Bat Necklace (Ringostone. $13. etsy)
6. Glow-in-the-dark Nail Polish (UO. $14)

        ------------------------------------------------------------------

Thanks Krystal! I love all your finds, especially the bat necklace :)

10/10/11

Guest Post >

Hello Sparrows and Arrows readers, I'm Nikki from Perpetually Engaged and I love all things weddings. I find inspiration all over the place so today I thought I'd share a little Halloween/Fall wedding idea with you.


Intimate backyard weddings are becoming more and more popular these days which means you have more control over the decor, and more importantly the landscaping. Unless of course you have controlling inlaws ;) If you have the time and space, I think it would be lovely to grow your flowers over your altar. Talk about a money saver too!


If you live in a state with decent Fall weather and can still have an outdoor wedding, I love the idea of growing pumpkins up and over your altar like these ones I saw at the botanical gardens in Geneva, Switzerland. Aren't they beautiful? You can find directions on the best pumpkins for climbing here.


Thanks for having me Jessi and Cassie!


                      ------------------------------------------------------------------------------------------------
Thanks Nikki! I want to try this! Go check out her blog for great wedding ideas and finds! I am already married and still check it out every day!

10/7/11

Guest Post > Scary Movies

Hello! it's me Erika from A Tiny Rocket and Halloween is one my all time favorite holidays.   It's the one time of year you can wear a costume, carve a pumpkin, and eat as much as candy as you can hold.  What I love most about Halloween? is of course scary movies.  My sisters and I- when were kids would sit around late at night and watch scary movies, drink hot cocoa, and snack on candy corn.  So here is my Halloween- all time list of scary movies! Muauuauaua- ok I had to do the scary laugh.

The Exorsist- Just mentioning the name gives me goose bumps.  A little girl being possessed by the devil. It's an oldie but a goodie- perfect for Halloween.  Make sure you keep your holy water handy for this one.

The Blair Witch Project- a faux documentary of a group doing a documentary of some old wives tales that take place in the woods.  So scary! I couldn't go camping for about a year after watching this movie.

The Ring- I remember watching this movie in college and my friend called me during it.  Scared me! I'm not spoiling it for you but it all starts with a phone call.

What's your favorite scary movie?

--------------------------------------------------------------------------------

Thanks Erika! I am a wimp does Hocus Pocus count lol??

10/6/11

Guest Post > Halloween Re-Style

Hi there, Sparrows and Arrows readers! My name is Mandi and I blog over at make it dear and I am excited to share a little Halloween restyle project that my son Clark and I worked on to share here with you!


We started out with a store bought piece of Halloween decor that had been gifted to us by a generous family member (thanks Nan!) and decided to give it a quick makeover. I liked the metal frame and had ideas about making it spooky with strips of shredded fabric that would blow in the fall breeze...


First off, we removed the small lengths of chain on the sides and the metal centerpiece with pliers and attached some twine between the two metal rings that were there.


Next we tore strips of different fabrics in different lengths to tie to the twine. I went with some contrasting ones and included bright orange and a mummy's cheesecloth!

Tada!  We tied the strips close together and left the ends tattered to for an old and creepy look.


This is how it turned out and I think it will be even cuter once we gather and decorate our pumpkins and can display them all together! Happy Halloween diy-ing! h&k, Mandi

     ------------------------------------------------------

Thanks for guest posting Mandi! Maybe we can get some pumpkins at the orchard this weekend :)

10/5/11

Guest Post > Vintage Halloween Decorations

Hi everyone! I'm Colleen and I blog over at Hello Olive. 

October means only one thing: Halloween! Even here in South Africa where it isn't traditionally celebrated, there are costumes and decorations for sale in the shops. My son celebrates his birthday this month and I can't wait until he is old enough to have a Halloween Party. In the meantime, here are some cool (and scary!) vintage decorations I've found.

> source
> source
> source
> source
> source

Have a happy Halloween everyone and thanks Jessi and Cassie for having me guest post!

                                        -------------------------------------------------------------
Thanks so much Colleen! I am pretty sure we had that cat decoration when I was little.
Make sure to check out Hello Olive -  it's super cute (you can tell she's a designer) and Colleen really  finds the cutest things online!
 
Related Posts with Thumbnails